Tuesday 24 November 2020

How to Prevent Regularly Happening Woodworking Mistakes


Mistake is the best teacher. It’s not important how you make mistake but how to correct your woodworking mistake makes you a smart woodworker. Woodworking mistakes are so difficult to avoid in almost every project and should be rectified or disguised well.

We have collected the common beginner’s woodworking mistakes and how to fix these woodworking mistakes by applying basic woodworking ideas.

10 Common Woodworking Mistakes & Their Solutions:

  1. Improper Selection Of Tools: Huge variety of woodworking tools are flooding the stores and market nowadays. Woodworking tools like handsaw, bandsaw, planner and jointer, tablesaw, wood scapers or sander, wood router and bits, spindles, jigs have their own purpose and are good companions in your journey as a woodworker. Woodworking tools are usually quite expensive, so before making the actual purchase, you should analyse which tools are best suited for fulfilling the demands of the type of job you want to perform. If you are unclear better work under a mentor for some time or surf all the pros and cons of the tool you want to buy from some authentic online sources.

2.Incorrect Measurement: Taking the precise measurement is very crucial in woodworking and your measuring tape and carpenter’s pencil plays important role here. The measuring tape should be tightly held while taking outer and inner measurements and the hooks of your tape should always be clean to avoid measurement inaccuracies. A tape measure is not designed for measuring very small measurements accurately. So, if you want to measure within an inch, go for the steel ruler instead. If you do use a carpenter’s pencil, make sure you sharpen it correctly. If you are using knife or some sharp tool, don’t mark a deep grove so that it can be sanded or planed out easily.

3.Dents In The Workpiece: Dents or scratches can appear even out of smallest mistakes like dropping of some sharp, heavy tool on your newly finished projects and may ruin its perfection. Getting rid of a dent is quite simple. Just wipe it up with a damp cloth and iron it. The steaming effect will expand the wood fill up the dent nicely. You can also fill up the dent with Timbermate wood filler that comes in many colors or sawdust from the same type of leftover wood combined with wood glue and then sand it for perfect finish.

4.Corner Chip In Your Workpiece: You can fix a corner chip by applying some CA glue and activator on it while exerting some pressure with your finger. When it dries up, just twist your finger and release the pressure. If the chip is already broken, set it up properly with the workpiece using a tape so that it is not misplaced. Remove the tape and just fix it up with CA glue and activator. The chip will be holding the work piece nicely again. Remove the extra glue with any hand planer or sand paper.

5. Uneven Joints (Loose/Tight): Cutting mortise and tenon joint is an inseparable part of a woodworker’s everyday life. These joints require the exact cuts for fitting properly and it’s the most common mistake to cut unevenly as a beginner. You can fix uneven wood joint quite easily. The trick to deal with joints that are tight is to try for dry fit first. If they are really very tight then you can use a mallet for making it bit compact. Dry fit test allows sufficient space for glue to seep in the joints. If the joint is loose, you can add up some extra glue for filling it up. If your joint is too loose, select a similar sized chip having same grain as the joint and glue it up. If the chip is bigger or uneven, sand it nicely. Now you can fix the joints properly.

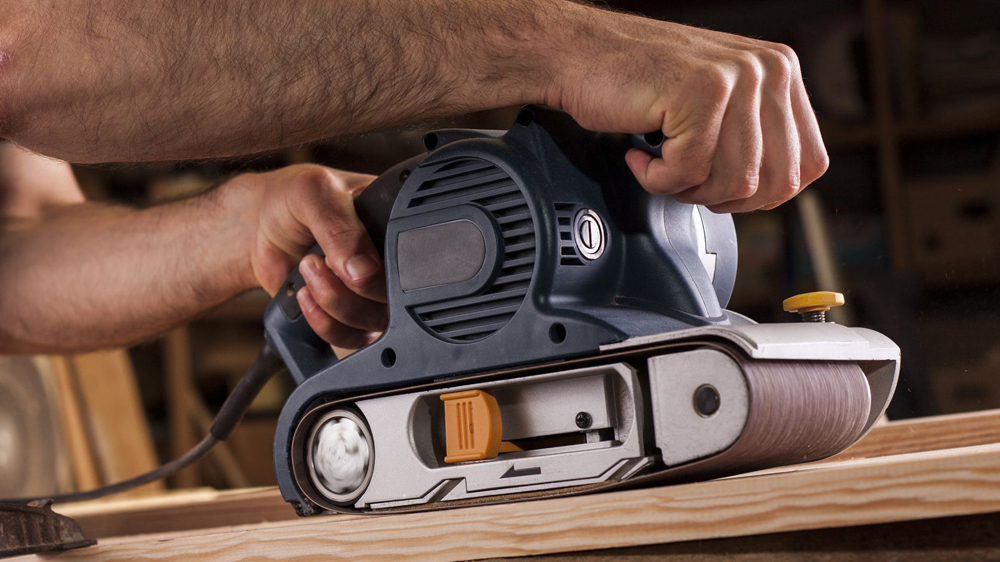
6.Uneven Cuts: Uneven cuts in wood are usually the result of a dull or blunt blade. You should replace your saw blade if it cuts unevenly every time. If you are getting splintering at the end of the cut, you may be turning your hand unconsciously as you push the work piece towards the finish. It’s a good woodworking idea for beginners not to cut your wood piece exactly, just cut it roughly 1/16th of the measurement. Then you can sand it down to exact measurement with the help of sand paper, rasp or a hand plane and fix the uneven wood cuts.

Cuts

7. Uneven Table Tops: You may end up making a table that is not completely flat even after so much of hard work. One option is to plane it till it becomes completely flat, if you can compromise on table top’s thickness. Otherwise, you can cut the pieces apart at the joints and try to clamp down them again without actually applying glue. Make sure the table top is flat this time using a straight edge. Now, glue it up and clamp again. Pressure should be just enough for joints to fix and remember not to over-tighten the clamps.

8. Over Sanded Wood: If the wood gets over-sanded in one specific area, it becomes uneven and distorted in appearance. To fix this mistake, spot the over-sanded area and run pencil all over the over it, and then sand off the marks with 100 grit sandpaper. Always try to sand along the grain of the workpiece. Hence, it’s better idea to sand first and then assemble your project.

9. Way to Fix Over Sanded Veneer Wood: Veneer is very thin sheet of wood so it can be easily over-sanded even if you are careful. It’s easy to camouflage this rather than repairing the actual damage. You can draw the grain again with the artist pencil colours or conceal it with artist oils, graining pens or furniture markers. You can also patch some veneer and sand through that area or else you can also paint over your project.

10. Mystery Glue Smears: Some unattractive glue marks become visible only when you’re varnishing or staining the finished project. You can easily get rid of these ugly marks with the help of a sharp cabinet scraper even when the wood is wet and then recoat it. Use a finish that sits on top of the wood rather than absorbing into it like varnish or shellac.

So, don’t be afraid to make mistakes, just try to avoid it or cover it up using these wonderful woodworking tips.


Thursday 12 November 2020

Quick 10 Tips on Must-Have Woodworking Tools


Tips and tricks are always seen as blessings as these save your precious time, energy and make your life easier. Tips from experienced woodworkers help in managing and doing complex tasks with ease. We have collected few tips from wise woodworkers about their tools and how to deal with certain problems. Let’s have a look…

10 Tips on woodworking tools

  1. General Safety Tips for woodworking tools: Before operating on power based woodworking tools, read the instruction manual very carefully. Knowing your machine well before using it is a must. Take proper training and never ignore safety practices. Always wear safety glasses or goggles, or a face shield (with safety glasses or goggles). Also, protect your hands and feet with suitable gloves and shoes. However, do not wear gloves when you are working too close to rotating blades and other machinery parts where it can tangle in between the blade.

2. Switch OFF the power button and unplug the power cord before actually examining, cleaning, repairing or changing a blade or any tool part as it saves you from accidental hazard. The habit of turning off unnecessary power when it is not required will also save your hard earned money.

3. Check stock for foreign objects: Always check the wood piece or stock for foreign objects like nails, screws, staples or any metal part entangled within it and remove it first before feeding to the blade of machine. This step is particularly necessary if you are using scrap wood.  These can become a dangerous projectile if it comes in contact with a spinning blade and can damage the blade also.

4. Do regular maintenance of your woodworking tools: Keep your tools always sharp for smooth and professional results. Worn out or dull tools like blades, chisels, planes, scrapers and gouges don’t cut evenly and could chip out wood. Sharp blades increase your efficiency, make your work easier and give you cleaner cuts.

5. Use a push stick: Jigs like push stick protect your fingers from being fed into the blade of the machine accidently. Always use a push stick to push a wood piece that is less than 6 inches (152.4mm) through the blade.  Proper and durable push sticks can be built in the shop or purchased from any fine woodworking supplier.

While the machine is still operating, do not remove sawdust or cuttings by hands from the cutter head of the machine. Use a push stick or brush when the machine has stopped running. Do not use compressed air to remove sawdust, turnings, etc. from the cutter head of the

6. Say NO to free hand cut on a table saw: Never try to attempt a free hand cut when you are working on a table saw. Use a push stick, the fence or the miter gauge to feed the wood piece to the blade. Use one of these options and always try to cut or rip along the direction of the grain of wood piece.

7.  Setting the depth of the handheld drill: Simply, roll up some tape on the drill bit to the point where you want the drill to stop as all holes do not require to be drilled thoroughly. Setting up stops on a drill press is quiet easy but sometimes using the drill press isn’t the best option.

8. Belt sander stop block: If you are using belt sander for sanding your boards, make a stop block of same thickness and clamp it in order to stop the board from jumping away from the work bench.

9. Magnetize your screwdriver: A magnetized screwdriver could save lots of dropping screws and searching time. This old trick is done by rubbing magnet along the shaft of a screwdriver many times in one direction only. You could also attach a magnetic strip on the wall and hang small tools and iron parts so that these are not misplaced.

10.  Recharge station for your cordless power tools: Cordless tools are great to work with as they can reach anywhere but recharging chargers and their tangled cords could mess up your workspace. It is a good to organise all your chargers at one spot and plugging then in one power strip.

Thursday 5 November 2020

List of Effective Tools for Timber Framing


Timber is the naturally available, low cost insulating material that is extensively used for building furniture, houses and outdoor structures. The most common species of wood used for timber frame homes are white pine, red and white oak, and Douglas fir, cypress and cedar

Timber frame usually refers to a system of panelised walls and floors structure produced from small timber studs and clad with board products where the timber frame transfers the vertical and horizontal loads to the foundations.

Wood Tools for Timber Framing:


Timber framing is known for building huge sturdy structural framework of wood and uses so many woodworking tools for that purpose. Timber framing tools can be categorized broadly into hand tools and powered tools.

Hand Wood Tools Used for Timber Framing:

Framing Chisels: Chisels are indispensible part of timber framing. Chisels should be selected carefully for making deep precise cuts. Usually, framing chisels are of 1-1/2, 2 or 3 inches, with long sturdy handles that can withstand heavy blows of iron hammers or mallets.

Hammers and Mallets: Hammers used for timber framing are heavy duty rip hammers having a straight claw. Number 2 or number 3 mallets are generally used for hitting, fixing or tapping the wood. Mallets and hammers with wood heads are lighter than the iron or steel headed ones.

Measuring Tape and Carpenter’s Square: A good measuring tape and carpenter’s square help you to measure length and angles accurately that results in properly cut wood pieces.

Drill: A drill machine is an important hand powered tool used to bore holes in wood for making a mortise or drilling holes or slots for the wooden pegs, which hold mortise and tenon joints together during wood framing.

Powered Tools Used for Timber Framing:

Powered tools are always great in saving your time and increasing your productivity so that you can look ahead for new upcoming projects.

Circular Saw: These professional saws are fitted with toothed circular blades that can make square and beveled cuts and can be set to any desired depth for the purpose of cutting timber very quickly and smoothly. The most used circular saws for timber framing are the 7-1/4″, 10-1/4″ or the 16″ circular saws.

Band Saw: It is an efficient power saw with a long and band like sharp blade having metal tooth stretched between two wheels. Portable handheld bandsaws are preferred in timber framing as these are light in weight and can be carried to the construction site for curving and squaring timbers or the cutting of joineries.

Chain Saw: These saws cut by rotating a chain of saw blades around a guide bar quickly. Electric chainsaws are quieter and lighter than fuel powered chain saws, vibrate less, produce no exhaust, and don’t require any special pre-mixed fuel to be kept around the construction site.

Chain Mortiser:  Timber framers love to use chain mortiser for creating perfect mortise and tenon wood joinery in a matter of couple of minutes.A chain mortiser cuts larger mortises, with the help of a chain fitted with cutters, just like a chainsaw’s chain that keeps rotating within a frame. The mortise is clamped to the wood piece and dug into it in order to remove out the required amount of wood for mortise.  These chains are available in various widths along with number of chains that are parallel. The solid or tipped tungsten carbide tooth last longer and are generally preferred.

Power Planers: These perform the activities of simple hand planer powered by electricity. So, powers planers are capable of reducing the heavy load of planing wood on a large scale in a short period of time. Select an electric planer that makes about 15,000 or more rotations in a minute. You can select the blade size as per your requirement.

Woodworking Router: A router is a versatile power tool that routs or hollows out wood from the selected area from wood pieces. Fixed base routers can do many things like routing the outside of wood piece, create a stylish molded edge like chamfers, cleaner rabbets, grooves, and dadoes in a really short duration of time.

These are the basic timbering tools widely used in the timber industry. Sharp tools are always an asset for your workshop so make sure these are always sharp for producing the best results. In case, you want to replace any dull blade, you can buy from local woodworking outlet or else select from some authentic online source.

Woodfordtooling offers you a huge variety of tools and blades at affordable prices. Go for our latest offers now!